Have you ever thought of putting tints to your windows? Thanks to quarantine period, I had a lot of time to think and reflect on how to improve our bedroom. Our bedroom is situated at the side of the house where the sun sets daily so it's really hot during the afternoons. Even if our air conditioning is on, the heat of the sun's rays still goes through the windows even with blinds or curtains. Since my husband works in the same bedroom and my children will be having their distance learning inside their rooms, I thought of a way to somehow block or lessen the sunlight without actually blocking the beautiful view of the trees outside and that is by putting window tints.
At first I thought window tints are only used for vehicles, but apparently you can also use it for your house windows. So I searched in Shopee if there are indeed window tints available. It turns out there are a lots of it. You can choose the colors, too. Since I'm scared of ordering overseas, I sorted out the list to Metro Manila merchants only and bought a standard window tint.
 |
| Solar Window Film It costs P150 per box (50x300 cm). The box includes the window tint film, cutter, and a wallpaper flatter. Not sure what the latter is called, but it's used for flattening the film. |
 |
| According to the box, the tint can also be used in buildings, apartments, etc. |
 |
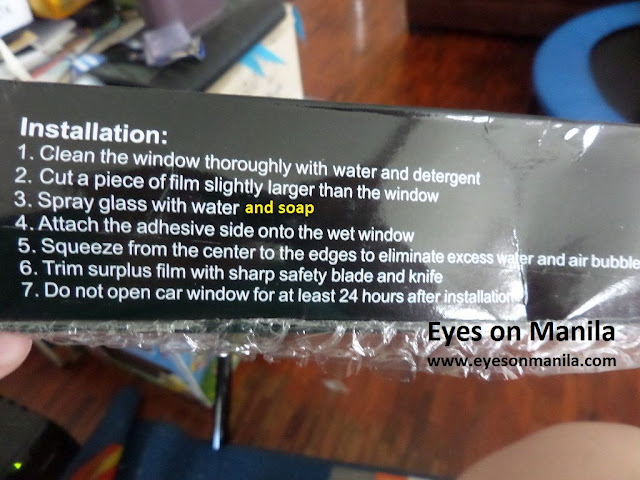
| Instructions on how to install the window tint The instruction here is for installing window tints for car windows. It's practically the same with installing tints on house windows. |
Installing Window Tint
- Clean the window thoroughly with water and detergent. In my case, I just cleaned our windows with wet wipes.
- Cut a piece of film slightly larger than the window. Since the measurement of the tint I ordered is almost as exact measurement with our windows, I didn't have to cut a piece. I just rolled it and cut the length that I need.

Make sure to use soapy water on the window before placing the film. My husband says to use shampoo to make the window more slippery for easy tint placement - Spray glass with water and soap. Yes, it's important that you spray soapy water on the window first before placing the window tint. This is a must so you can adjust the arrangement of the tint, making the job easier.
- Attach the adhesive side onto the wet window
- Squeeze from the center to the edges to eliminate excess water and air bubbles. This is where the wallpaper flattener or the yellow item comes in.
- Trim surplus film with sharp safety blade and knife.
 |
| I have already installed the tint on the right side window. Notice how bright the sun is on the part where there's no tint yet? |
It doesn't look much, but it gave a huge difference when it comes to the heat coming in. Of course, it also decreased the brightness.
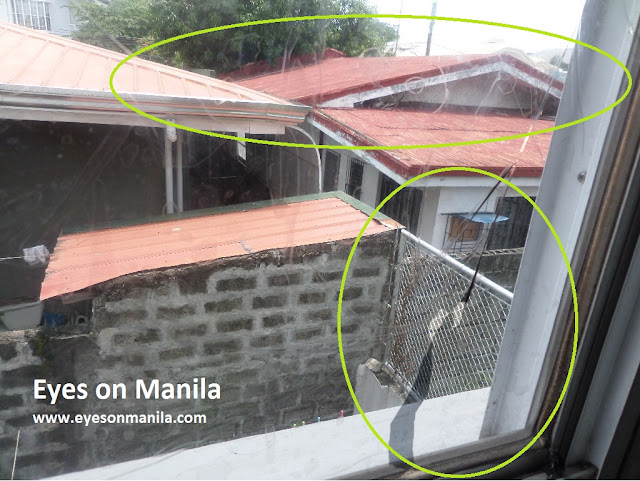
In case you were wondering what happens if you try to place the window tint on your windows without using soapy water, I actually have a picture here:
In case you were wondering what happens if you try to place the window tint on your windows without using soapy water, I actually have a picture here:
 |
| Window tint without using soapy water |
This is actually what I did at first after following the original instructions. I asked myself what I did wrong until my husband told me about the soapy water. As you can see on the picture above, there are plenty of "bubbles" and broken film. There are still a lot of imperfections that the camera failed to capture.
I hope this post has helped you even in a little way. I hope you have enjoyed reading it.


No comments:
Post a Comment